Custom admin notifications help to keep your website users informed. They are used to pass information to employees or users. You might have witnessed these notifications on your dashboard earlier. But they are mostly from plugins or WordPress itself. Here, you will learn how to add and display custom admin notifications on your WordPress Dashboard.
Adding Custom Admin Notifications
There are many ways to add custom admin notifications. The simplest way is to use the KJM Admin Notices plugin. Download and install the plugin. Then, activate it.
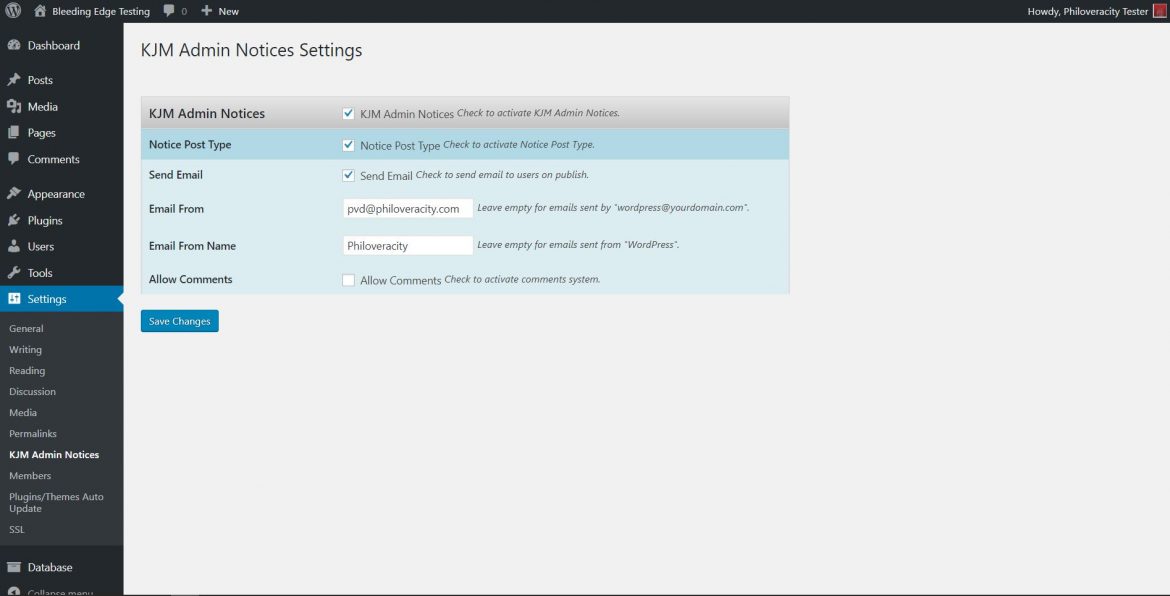
On the WP dashboard, go to settings -> KJM Admin Notices. Check the first checkbox to activate it. The plugin also allows you to send emails to users when you post custom admin notifications. Now, click save changes.
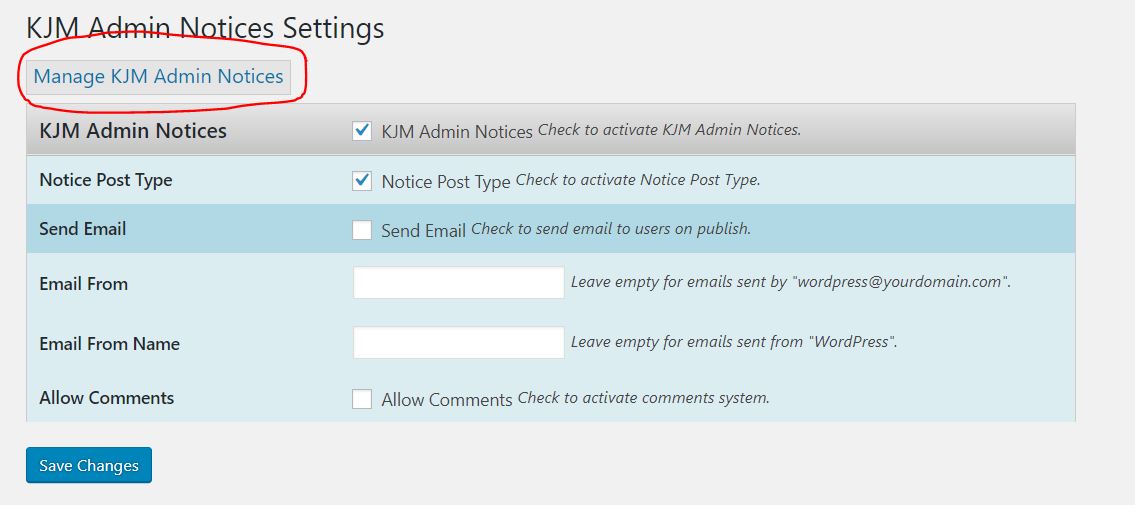

After this, you will get button titled ‘Manage KJM admin notices’. Click that, and you will see a page, similar to the WP posts page. This is where you can add, edit and delete notices.
Now click ‘Add Notice’. You will see something similar to the WP post editor. Type in a title and some detailed info about the custom admin notifications. You can also add images or other media.
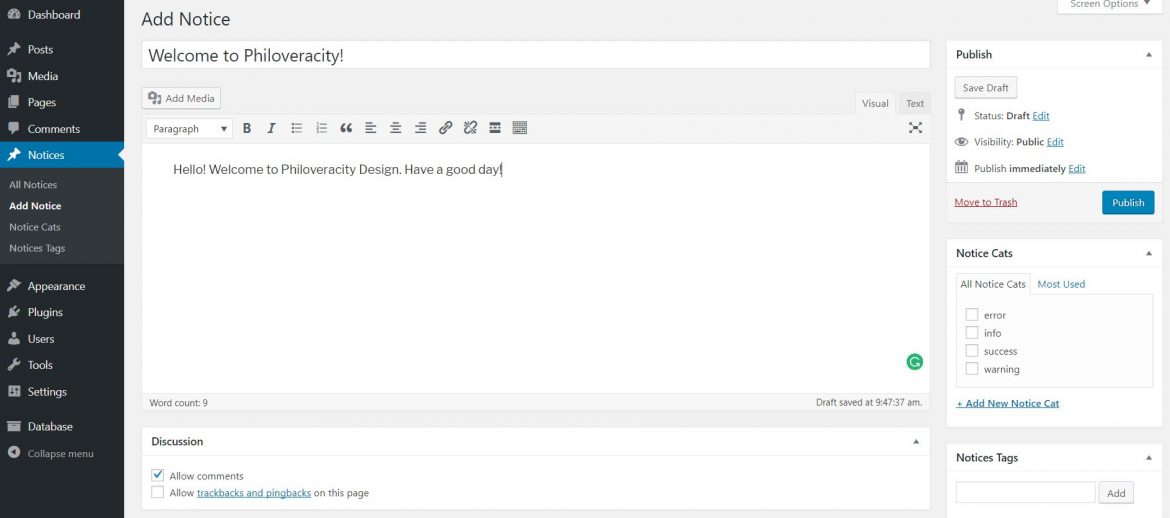
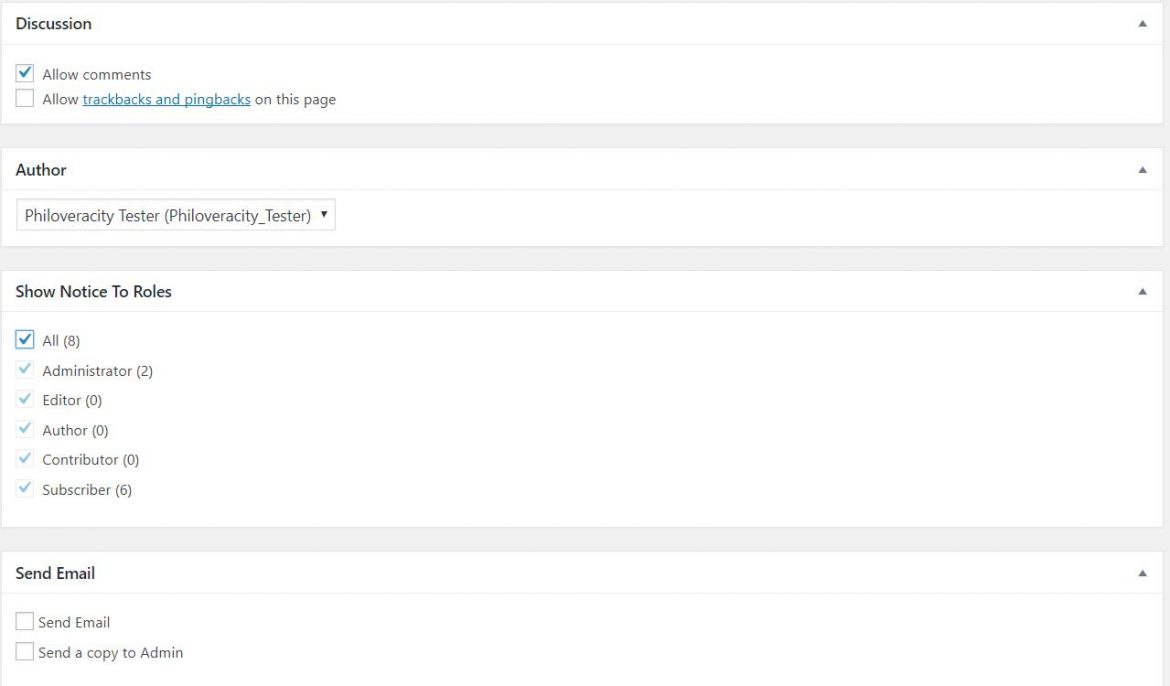
Choose the recipients of the notifications. You can also choose whether to email them or not. Then, click Publish.
You can now see the notification on your dashboard. So will the other users, if you have chosen to display it for them. You can manage notices hereafter from the Notices tab in the WP dashboard.
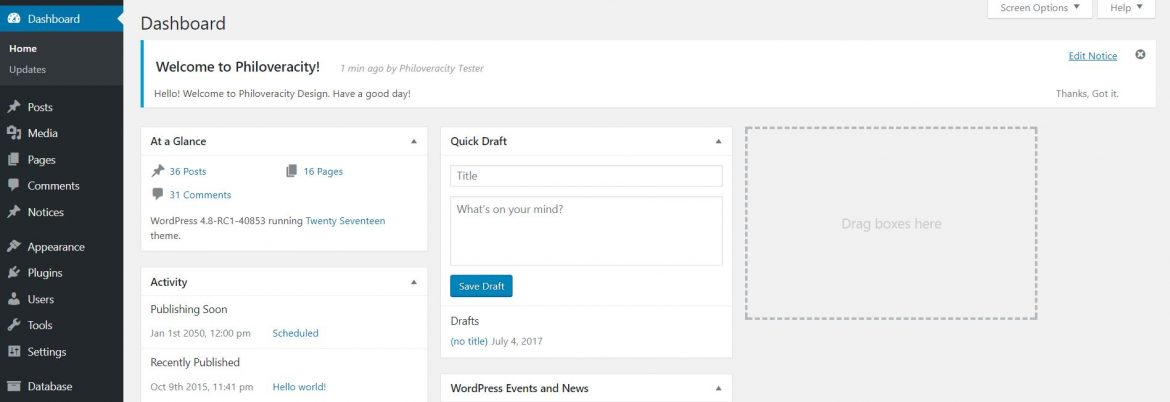
This is the best way to add custom admin notifications on your WP dashboard. With this plugin, you can create those admin notifications easily. It’s also easy to manage them. To be updated with the latest WordPress tutorials, subscribe to this blog. If you are interested in revamping your website, check out our DREAM package.






Leave a Reply